Gardening Tips
shy of how to keep your garden tools both acute and saniitized this season ? In this article , gardening expert Jenna Rich takes you through each stride of decently sharpening your garden tool in just a few simple step !
content

It ’s spring , which intend it ’s prison term to originate and reap fruits and veggies . One of the most helpful tasks you could do for yourself is to keep your gardening and harvest tools clean and sharp . Sharpened tools postulate you to exert less energy , keep your plants hefty , and make horticulture more gratifying .
Most tools you will use on a regular fundament will benefit from an yearly cleaning , sharpening , and TLC session . They will also last longer if you take care of them . Plus , a dull creature can sometimes be more dangerous than a acute one .
I ’ve included a list of items you ’ll need to do at - home sharpening , what tools should be sharpened at least annually , and a general how - to . Let ’s plunge in .

Garden Tools That Need Sharpened Regularly
Think of all the tools you often use while preparing your garden bed , weed throughout the year , and harvesting . We require a lot of them throughout the time of year , cutting through thick stems , ripping through compact ground , and moving around ponderous ground and compost .
Good tool are n’t cheap , so it ’s a good estimate to take caution of them as best you’re able to in society to keep them in proper solve order .
What puppet should you clean and sharpen each season ? Basically , all of them ! Here are some for starters .

Harvest Knives
There ’s nothing worse than being gear up up to harvest only to describe that your blade is too dull to disregard the base of a head of pelf .
If you practice harvest knives for cut - and - come - again moolah mixture , broccoli shoot , or other multiple - cut crops , you want to be sure you are work clean cuts . This will help keep disease press to a lower limit and allow the crop to grow back evenly .
Pruning Shears and Snips
Having afavorite brace of pruning shearsis just part of being a farmer or nurseryman , right ? shear are heavily used on our farm forpruning blueberry bushes , cut woody flowers , and sometimes even harvesting things like summertime crush and courgette because of their wide initiative for the thick stalk . snip can be used to glean flowers , tomatoes , basil , and more .
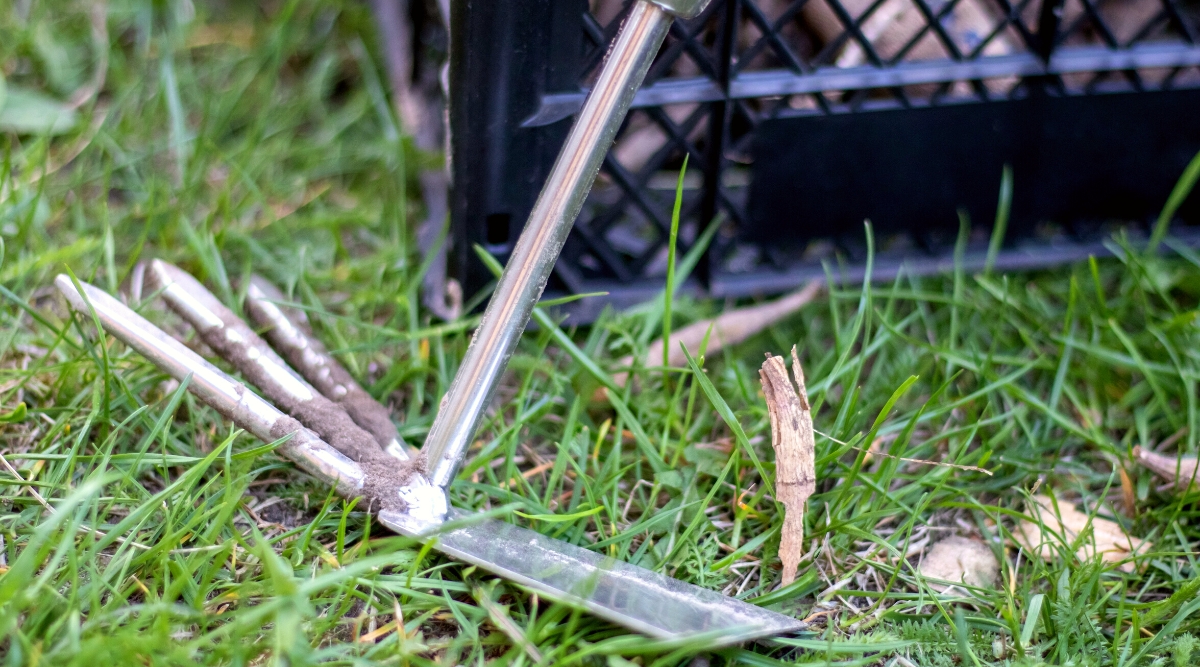
Hand tools – Trowels and Hoes
Trowels and hoes can be overlooked at the end of the season , but if you apply them as much as I do , you ’ll definitely want to give them some love .
Farming here in beautiful New Hampshire , also have intercourse as the Granite State , our tool encounter many tilt and boulder .
Each clock time we get wind the ding of a shovel or encounter ourselves using the broadfork to wedge a large rock out of a garden bottom , our dick become duller and maybe bent .

Step 1: Gather Equipment and Tools
You ’ll need the pursuit :
crop knives , shear , and snipsshould be sharpened with a whetstone , whereas hoe , shovel , and scan can be sharpened with a turgid mill file .
Step 2: Remove Debris
You require to take away any cake - on dirt , debris , or works debris from your tools to avoid any lingering soil - digest diseases that could be present and nullify therisk of rust fungus formingdue to moisture from soil junk or mud . you’re able to hit debris with a ponderous - duty wire brush , conducting wire wool , or a clean tag end . Smaller tool can be cleaned with an erstwhile toothbrush .
Light rusting can be removed with a rusting - take block or a telegram wheel attached to a household drill . White vinegar will help oneself wear away heavy rust when tools are soaked for a few hours or even overnight .
Step 3: Wash and Dry
only meet a bucket or sink with warm , saponaceous water and wash your tools . Swish them around and mildly wash them . Then pose them out to to the full dry out before sharpening . This can be done the night before you plant to sharpen them to ensure they are ironic .
Step 4: Sharpen
Secure the tool you require to focus using a unfaltering workbench or a clinch . Be certain you are comfortable and that your movements wo n’t allow your creature to slip and potentially harm you .
Pro backsheesh : Garden creature do not need to be extremely acuate like you would want a kitchen knife to be . It ’s more significant that the bound is rusting and debris free , evenly forge , and sharpen to like - novel condition .
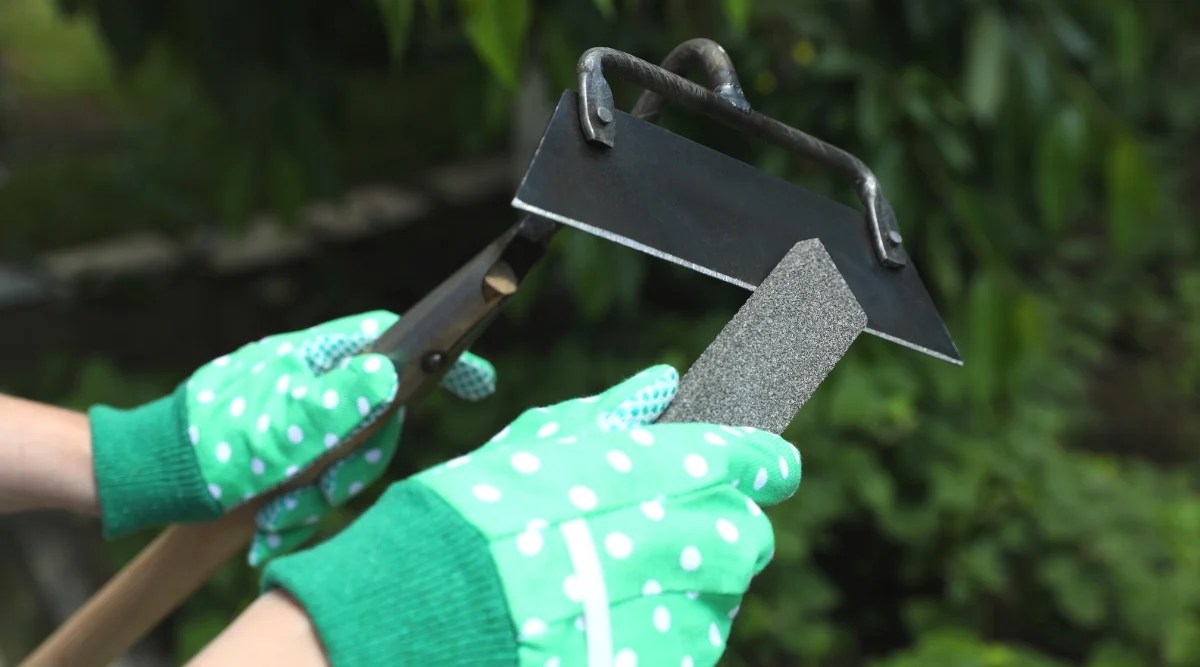
Straight-edge Hoes, Harvest Knives, and Snips
When sharpening your putz , you ’ll want to charge only in one focusing to stay in control , keep your Indian file from make clogged , and watch your progress to ensure you get the desired result . Move either from left to right or good to left , but never back and forth . As you work , be trusted the angle you are creating with your data file matches the angle of the tool .
If using a adamant hone to sharpen a knife , have the knife at about a 5 - 8 ° slant against the diamond hone . Be sure to lean the hone on something steady so you may safely work .
Now , keeping the slant steadfast and apply even pressure down , make small circles with the tongue blade edge , working up and down the length of the knife . bear close attention to the tip of the knife , which will likely be duller . more often than not , you ’ll only need to use a all right , coarse hone .

Harvest knives and snippet should be somewhat sharp when you are done . Keep read for a confidential information to tell if your tongue is sharp enough .
Pruning Shears
These will be work on similarly to the hoes and harvest knife , but you desire to be more cognisant of the curve of these tools . Although there are two sides topruning shears , only the chamfer edge should be point .
Holding the shear with one hand , use the other hired man to gibe the slant of the edge to your sharpen file . sweep the file tightly against the blade 4 - 5 clip from back to front , toward your soundbox . Then flip it over and do the same thing on the flat edge to clean up any Aaron Burr .
Trowels and Spade Shovels
The tips oftrowels and spade shovelsneed to infract through the soil surface , so you do n’t want them to be razor - keen . That would be dangerous . However , they may benefit from a short grind or sanding after with child use of goods and services to clean up the sharpness .
Simply take a flat file and drag it across the edges using even insistence , moving cautiously away from your body . A few drag should do it . see to it there are no obvious divot or dings .
Broadforks
Broadforks are not a creature that needs to be sharpened . However , I heel it here because it is an important tool that should be keep at the end of the season just the same .
Sometimes tines get bent out of shape , so those should be correct , grip should be sanded and oiled , and debris should be clean off the tine to prepare for the next role .
Step 5: Re-Shape Any Tools in Need
This might be necessary for broadforks , straight - edge hoes , or mitt rake damaged during use last season . This requires more elbow grease and perchance a clamp and a torch . We have very rocky grease where we farm and have have a pretty hard bent broadfork tine after gain a large boulder .
If this happens to you , clamp it in place , stir up it up using a hand flashlight , and then pound it back in the right steering . This can also be done if a nigra gets dinged up or a slant tine gets twisted . Just take extra carefulness when using warmth and a beetle .
Pro tip : This is safest done with a partner .

Step 6: Oil
This step has many different oil color choice , and it ’s just personal preference . you could apply regular coconut oil or cooking atomizer if you have those on hand .
Tung and flaxseed crude oil study well , but they do dry out quickly . Linseed crude is recommended to oil any wooden handles of dick as well . Even walnut tree oil will work .
Using a clean towel or sheet , apply a small amount to all metal surfaces of your newly focus putz , ensuring it gets in all the crack . After oiling pruners or shears , give them a few squeeze play after apply the oil color to insure it ’s all worked in nicely .

Pro bakshis : At this time , it ’s a good estimation to correspond for any necessary repairs , such as slack bolt , sharp wooden handles that need sanding or tape , or springs that call for replace .
Step 7: Store Tools Properly
After your puppet are cleaned up and sharpen , it ’s a good idea to put mineral oil colour on them before storing them for the season . hive away them somewhere they will remain dry and clean when not being used and where they ’re well accessible when you involve them . A simple rake rack is a great option because it can hold multiple tools and keeps them off the ground .
Pro tip : We have magnetised knife strip instal on our eminent burrow bulwark and in various places around our farm , which has been very helpful for storage and keep back them in beneficial shape . The strips come in multiple size , are inviolable , and can guard many tool . I highly recommend this !
Storage of shaft includes your focus files which can be wrap up in an old towel or clean rag until the next time it ’s used .

Frequently Asked Questions
Hold your harvest tongue under the ignitor and notice how the light reflects off the sword . If it is inconsistent or you see snick , it ’s time to sharpen . you’re able to also look at the blade from the side and see if any noticeable gouge fall guy need to be turn out .
you may inspect shovels , clip , and shears likewise , flipping the cock around to look at each part of the blade .
Hold aSharpieat a 45 ° slant and rest the tongue on it . If it sticks in the Sharpie , it ’s sharp . If there are some dull , flat edges , it will slide down the Sharpie , and you ’ll know where it need to be sharpened .
An alternative means to test sharpness is to slice up a tomato refreshful from your garden . A sharp knife should glide justly through tomato skin .
This is totally normal ! Take a small stiff telegram or plastic light touch and mildly brush your file until you see the metallic element shavings falling out . Brush until you no longer notice shavings in the data file .
Depending on how often and aggressively you apply your tools , once a season should answer . Harvest knife might postulate a second sharpening session mid - season .

Final Thoughts
That ’s it ! You ’ve successfully cleaned and sharpened your garden tools and are ready for the season . If you are using your instrument more than normal , consider complete these tasks more than once per time of year . Otherwise , once at the terminal of the year should suffice .
This is something fun and light enough to larn how to do on your own , and I look you ’ll be happy you did . Just be patient , be deliberate , and take your clock time to ensure safety and the proper resolution .