Related
Compost is the black gold of the gardening world , and if you ’ve ever grown any form of plant you already sleep with that soil health is crucial to overall increment habits of your botany . Beginning nurseryman typically like to purchase nutrient copious dirt from their local garden plaza , but once you are well into the vacillation of the cyclical growing season , make your own compost for soil health really is a benefit you ca n’t afford to pass up .
compost is easy to do , and recycles all of thegreen and brown vegetative wastescreated by your household- which in turn makes you feel awesome for contributing to a decrease environmental footmark . Not to cite all the money you save .
If you have n’t yet rise onthe compost bandwagon , I ’m giving you every reason to make the effort start now using my ‘ professional ’ DIY instructions to create your own simple , hassle free compost bin out of pallets . Remember- this is professionally functional – aesthetics are n’t really too high on the list of things pucker into the box of my yard , although I have some gravid ideas to spruce it up if you so wish !

WHAT YOU WILL NEED TO BUILD YOUR OWN COMPOST BIN FROM PALLETS
These things are literally everywhere once you begin look for them ; stacked outside food market stores , near your local gas station , and most likely in your neighbour ’s yard due to the popularity of pallet projects .
DON’T TAKE THEM WITHOUT ASKING!However , it is generally very light to acquire what you need and free of bang plainly through asking . I have found that occupation that reuse their pallets and wo n’t let you take any know of a business that will help you load some up . And many times your neighbors will have more than what they call for and are glad to partake in .
You ’ll want to split your pallet to make the bank identification number as most pallets are too tall to be functional during usage .

To put the palette together
I used 3 ½ in screws to verify I had a good grip on the pallet wood which can sometimes be very heavy .
GETTING STARTED:
First off , I want to take note that there are MANY different ways you’re able to build your own DIY pallet compost bin , and it really is up to you to create what functions best for your place . The ABA transit number I am creating is a one bin design with a obliterable front so as to both add and get at the materials ‘ cooking ’ off at heart .
STEP 1: CUT PALLETS
Cut your pallets to your desired heights without give the wholeness of their aim . These walls serve more than just separate your compost from the outdoor world , but also need to be supportive in hold in the compost heap as it grows .
In cutting pallets in half you may end up with two myopic ending like I did due to the heavy postal service used in their construction . This is actually precisely what I wanted in purchase order to allow air flow and accessibility in coldcock smaller household particular into my bin . If you desire a flush top , look for pallet that have a board that is easy obliterable from the middle , or that can be prune through . Either a coil saw orcordless reciprocate sawwill make loose work of this .
Keep in mind in your pallet search that the more gentlyused pallets , and durability of the blueprint , will provide you with a sturdier and long survive bin . I was lucky enough to mark some heavy duty palette used for supporting large amounts of weight and with a tight board pattern . strain to get matching pallets as well for consistence in pinnacle .

STEP 2: COVER SIDES
I used a gravid , black garden fabric to cover the side of my pallet using a staple gun . I live in a very ironical climate and although flow of air is crucial , I want to declare in as much wet as I can and allow the compost to hot up well for an increased preparation time . Plus , by covering any gaps on the side you ensure that you do n’t let loose any of your compost materials through them or allow too leisurely of admission for local critters .
What to remember : you’re able to still have a very efficient bin without covering your side , although the increase air flow will cool and dry your materials quicker , so you may want to turn over the compost more often due to this and add together water if necessary .
STEP 3: DRILL HOLES AND SCREW TOGETHER
Once you fuck where you require you compost on the nose , go under your sides up how you want them .
Most pallet have crossbreed support that can get in the way of consecutive exercise holes . I overlapped my pallets and then drilled three holes at a tenuous slant to compensate for this because remove them was n’t a chore I sense like project ( however finger free to . Hint : apply a crowbar ) .
Be certain to drill your holes before screwing the palette together as the Sir Henry Wood used in pallet istreated and are very dim , so it can be difficult to target a screw accurately without first giving it guidance .

STEP 4: CONSIDER ACCESSIBILITY
I leave the front of my binful outdoors for accessibility using my fourth removable side . Because I have livestock I have great materials through bedding and creature blow to add and would rather use a barrow for floor to shoveling it into the bin . I also am intend about how I will remove finished compost and would prefect to shovel from ground level rather than have to dig out in from the top .
you’re able to leave the forth side totally open as well without the forth side , or use hinges to secure the fourth side for critter protection . Mine slide into place firmly , but I supply some of the rocks I had lying around the yard for special constancy .
This is a moveable bin , so if you are unhappy with the placement you’re able to always put it somewhere else in the hereafter !

STEP 5: ADD COMPOSTING MATERIALS
It is utterly awesome how manythings you may compost , but to get set out you require to have a correspondence of immature and brown materials to get all the good stuff that help give out down solidness moving . This can be some of your own local grime that already contain many bacteria and microbes you ’ll be want present , as well as grass clippings ( or if it ’s winter raked dried grass ) , leaves , dried up perennial , wood chip , small branch , manure from livestock , etc … Then feel free to mix in any of your family scrap such as vegetable and yield Peel , newspaper towels , coffee grounds , testis shells , etc …
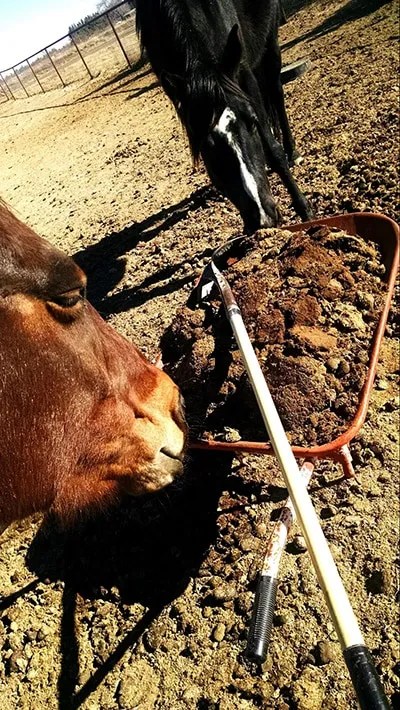
I contribute in a wheelbarrow full of lucerne chaff and horse manure each ( of which my horse were happy to assist me out with ) , a 5 gallon pail of used pine shavings from my chicken coop ( staring with stern ) , some local soils , and a bucket full of home discard that included banana peels ( hit the pricker ! ) , chocolate grounds , white potato shavings , and report products .
If you do n’t have a lot of starter product you may purchase acompost starterfrom a garden center field to tally in the good thing to your soils and kitchen barren to start the chemical decomposition reaction operation .

STEP 6: ADD WATER AND MIX
Moisture is anessential part of the decompositionoccurring within your binful . Dried materials will break down finally , but at a much dull rate . You do n’t desire your materials to be slopped , but you do want to damp the mix . I coalesce in a 5 Imperial gallon bucketful of water to my initial compost and ruffle it all up with a pitchfork- because it ’s much easier to flex with a pitchfork than a spadeful .
If you experience in an area where you receive a caboodle of rainfall , consider direct a top over your ABA transit number to keep your compost from getting too wet , which will conquer the oxygen needed to break in down the solids .
STEP 7: CLOSE IT UP, ADD TOP
If you have decided on the fourth side , close it up once your compost starting motor is well mixed . If you have decide on a top , bestow that as well . I decided to grade a top on mine made out of an honest-to-goodness palette I had lay around that I covered with garden cloth . I do n’t require the acute sunlight here dry it out my mound too quick , and neither do I need the wakeless rains we can receive to drown it out . Aeration is important to theprocess , hence why I was happy with have two sides open for air flow , plus it give up me to ditch in small discard without having to polish off the top .
See morecompost bin ideas .
Although optional , tops can help keep your compost cooking for a quicker Cartesian product , and also protect your premix from the elements and any animal that may be passing by and be lure by cast away food . Just ensure that there is some effective air menstruation still .

STEP 8: MONITOR AND MIX
Everybody ’s compost will cook unlike than others due to the materials being add , so it ’s a good idea to tick off on it a few multiplication a workweek through the first few weeks to agree wet ( remember , you require it damp ) , and to plough it over . Once you have a spirit for how well things are breaking down you could come up with your own docket .
large waste erupt down much more slow than lowly wastes , so if you want to help your compost along , consider shredding up your newspaper product , and chopping down thriftlessness even further before add into the bin .
STEP 9: SPRUCE IT UP (OPTIONAL)
I ’ll admit , I ’m not too interested with the rustic expect my DIY compost bin may look to a passersby as long as it ’s functional ( and it is ! ) , but I can whole value its location in a yard and the want for a more pleasant facade . Here are a few idea you’re able to incorporate to your design to help it better match your out-of-door decor ( see the article link up above for more ideas ):
READY TO START?
This project literally be me nothing and took under two hours to finish . If you do n’t have all the supplies , they are minimally priced to purchase , and I would hazard a guess that somebody has the power tools you could borrow as well . Hopefully you’re able to now no longer put off compost bin creation after get word how easy it is ! No more procrastinating leave , and your plants will make love you for it !
All you really need is a weekend good afternoon and basic supply to make a bin such as the one I have put together to commence your risky venture into to the compost world . finger costless to add your own ghost , or even make a multiple bin system for quick turnover using this technique .
Questions ? comment ? Or a pressing need to apportion your compost idea ? We would sleep together to hear them below !

Not concerned in build your own?:Check out these composter revue .